
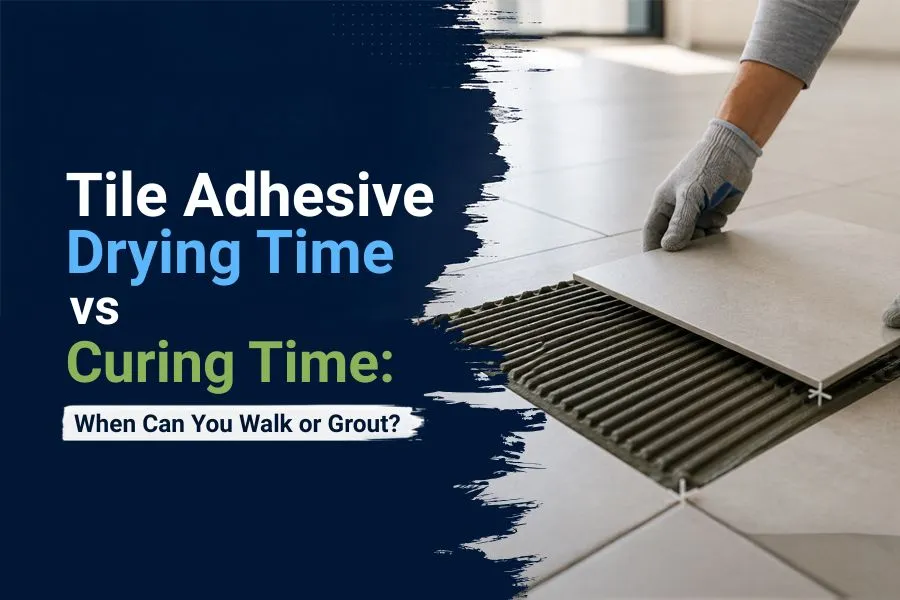
Laying tiles is not just about placing the tiles on a wall or floor and ensuring they appear straight on it. What occurs post-installation is equally important. A tile adhesive must take time to set, dry, and form bond strength before any foot traffic, grout, furniture, or any other loads are placed on it.
Table of Contents
Here is where the confusion often begins. The time of drying a tile adhesive is not the same as the time it takes for it to cure. It is possible for the tile adhesive to feel solid at its surface while the adhesive body is still gaining strength.
If one walks on the surface too soon or grouts it before the adhesive is set, its bond would be compromised, leading to loose tiles, cracked grout joints, hollow spaces, or total failure of tile installation.
Does this mean that manufacturers, contractors and house owners should be aware of these phases so that they can make informed decisions? It does.
What Is Tile Adhesive Drying Time?
The term tile adhesive drying time implies the time that elapses until all moisture is out of the adhesive and it reaches the necessary firmness for further application.
With cement-based adhesive, when the adhesive is drying, water evaporates and is used for cement hydration processes. Depending on the formulation and ambient conditions, additional evaporation may be required to achieve the essential structure of the tile adhesive, which provides the connection between the tile surface and the subbase.
In this respect, it should be kept in mind that if the surface seems dry, it doesn’t mean that the adhesive has already achieved its final strength.
This differentiation is especially important in the case of large-size porcelain tiles. It has been proven that due to the fact that such tiles have a great cover and the level of water absorption is quite low, moisture movements beneath these tiles take a relatively longer time in comparison with less absorbent tiles.
The drying time depends on the following factors:
- Adhesive composition
- Dimensions of tiles
- Thickness of the adhesive layer
- Absorbency of the substrate
- Temperature
- Level of humidity
- Circulation of air
- Content of moisture in the substrate
- Does the installation process occur indoors or outdoors
Therefore, there is no single drying time that applies to every tile adhesive.
What Is Tile Adhesive Curing Time?
The process of curing refers to an adhesive’s development of mechanical performance following application.
In the case of cement-based tile adhesives, curing is practically synonymous with hydration of cement. When cement and water come together, hydration occurs, producing hydration products that make the adhesive stronger.
With polymer-modified adhesives, the performance of the polymer is crucial when it comes to the effectiveness of the adhesive. After being mixed with water and applied, the polymer will take part in the process of formation of the film after adhesion (the process will depend on the formulation).
The point is that drying does not guarantee curing.
A tile may seem stable after a short period, but the adhesive may still be getting stronger. Manufacturers provide consumers with different recommendations regarding the waiting time for light use, grouting, or heavy loads.
Tile Adhesive Drying Time vs Curing Time
The difference can be understood easily:
| Factor | Drying | Curing |
| Main process | Moisture leaves the adhesive and the material becomes firm | Adhesive develops its intended mechanical strength |
| What you notice | Surface becomes harder and less wet | Bond becomes progressively stronger |
| Does it mean full strength? | No | Generally represents continued strength development toward the product’s specified performance |
| Can the surface be disturbed? | Still risky | Safer once the manufacturer’s specified period has passed |
| Main influencing factors | Temperature, humidity, ventilation, thickness | Cement hydration, polymer film formation, temperature, moisture, formulation |
| Typical concern | Premature grouting or movement | Premature heavy loading |
The terms are sometimes used interchangeably in everyday construction conversations, but they are technically useful as separate concepts.
For an installer, the practical question is not simply, “Does it look dry?” The better question is, “Has the adhesive reached the strength and stability required for the next stage?”
Why Understanding Adhesive Setting Time Matters?
The process of adhesive hardening involves many steps. After mixing and applying the adhesive, it must retain its properties for a sufficient amount of time so that it can be spread and worked out with a trowel and have the tile laid on it.
Then, the adhesive starts hardening. At this point, the tile is stable, but its adherence to the surface is not very strong.
The process of drying and hardening continues after the setting time. If a tile is disturbed during this period, it could be hard to notice. The tile may be slightly moved without being visibly loose. The ridge of the adhesive may have an uneven profile, which will cause disadvantages in coverage. After some time, this installation may show problems, such as hollow sounds, cracked grout, or debonding.
This is the reason why adherence setting time is an important aspect of quality control in addition to being a matter of convenience in installation.
Factors That Affect Tile Adhesive Drying Time
1. Tile Adhesive Formulation
There are many types of adhesive for tiles, with each possessing different technical properties. Tile adhesives can be based on cement, have a quick setting time, use polymer modification technology, or can be special adhesives. Although a quick-setting adhesive achieves a certain level suitable for handling faster, it must still be applied in accordance with instructions. Significant factors of the adhesive formulation include open time, water retention, flexibility of the adhesive, adhesion properties, and characteristics of curing.
2. Tile Size and Porosity
Tile size, however, plays an important role in working with adhesive. Larger tiles give greater surface area to work with adhesive, and more importantly, they usually become less porous. Smaller tiles may have totally different behavior than tiles with larger dimensions. Porcelain tiles gain significance in the context of their very low porosity.
3. Substrate Absorbency
One more important factor concerning tile adhesive technology is the absorbency of the substrate used. Therefore, porous cement substrates may absorb excessive amounts of moisture. Extreme water loss is undesirable to some extent since it may negatively affect the workability of cement.
The substrate should therefore be properly prepared and within the moisture condition specified for the adhesive.
4. Temperature
The hydration of cement and the evaporation of moisture are affected by temperature. Warm temperatures can assist with some drying processes, but if temperatures are too hot, it can shorten the open time of the adhesive, making installation more difficult. Cold weather slows cement hydration and can greatly prolong curing. Installers must work within the temperature limits set by the adhesive maker.
5. Relative Humidity
High humidity causes the rate of evaporation to slow, because the surrounding air already has an adequate amount of moisture. For example, a bathroom not very well ventilated might take more time to dry than other well-ventilated places.
6. Adhesive Thickness
Just using larger quantities of adhesive does not mean that there will be a stronger bond created. Applying a thicker layer of adhesive means that it contains more material that needs to cure and harden. Proper selection of the trowel and the thickness of the layer are necessary for the planned performance of the bond.
7. Ventilation
Moderate airflow assists in the drying process by taking the moisture away; however, too much heating at the beginning of the installation can lead to non-uniform installation.
Why Patience Leads to Better Tile Installations?
Tile installation is pretty much one of those jobs where rushing can lead to expensive problems.
Consider, for example, a contractor who finishes installing a floor in the morning and allows workers to start walking on it only a few hours later. The tiles might seem stable, but the movement is sure to aggravate the adhesive underneath.
The same goes for grouting; getting it done early will make sure that the incomplete adhesive bed receives additional moisture and disruption.
Notably, the consequences of rushing may not be noticeable straight away. Tile issues can emerge weeks or even months later.
It is easy to understand that by allowing the adhesive enough time to set, one can avoid a lot of trouble.
Typical Tile Adhesive Drying and Curing Timeline
The precise timetable varies according to the product and conditions of the site, the installation process is generally done in the following order:
Stage 1: Preparation of Surfaces
The surface is cleaned and inspected. It should also be prepped according to the instructions given by the manufacturer of adhesives.
Stage 2: Adhesive Mixing
The required amount of water is added to the dry adhesive. The correct ratio of water is an essential factor, since an improper ratio may lead to unsatisfactory results during performance.
Stage 3: Applying the Adhesive and Placing of Tiles
The adhesive is applied with the help of the required type of trowel. After that, tiles are positioned properly and pressed against the adhesive in order to get the required coverage.
Stage 4: Initial Setting
The adhesive cures and keeps the tile in place.
Stage 5: Drying
Moisture is released from the adhesive, giving it additional solidness.
Stage 6: Grouting
After the obligatory wait period advised by the manufacturer and the adhesive become firm enough, the grout is applied.
Stage 7: Continued Curing
The adhesive continues developing its intended properties after grouting. Heavy loading should still be avoided until the manufacturer’s specified period has passed.
For many standard cement-based systems, approximately 24 hours is a commonly encountered waiting period before grouting or light traffic. However, this should not be treated as a universal rule. Always follow the technical data sheet of the actual adhesive.
When Can You Walk on Newly Installed Tiles?
This is probably the most commonly asked practical question right after the tile installation. The answer depends on the type of glue employed.
In case of standard cement-based tile grouts, it is common to allow light foot traffic only after the curing period indicated by a manufacturer is over. It usually lasts around 24 hours, depending on the particular product.
However, some conditions may require more time:
1. Large tiles
2. Low absorption/non-absorbent surfaces
3. High humidity
4. Low temperatures
5. Thick grout bed
6. Poor ventilation
7. Heavy or concentrated load
Light foot and heavy construction traffic should be treated differently, as loading a properly installed floor by a person and a loaded trolley or some construction instruments or heavy furniture is different.
When in doubt, it is better to keep the area closed for a longer time than to test the surface unnecessarily.
When to Grout Tiles?
Grouting should begin only when the adhesive has reached the stage specified by the manufacturer.
For most classic cement-based tile adhesives, it happens approximately 24 hours later in routine conditions. However, this time may vary dramatically depending on the product type and the ambient conditions.
Prior to grouting, the installation team must ensure that:
Tiles do not move at all.
Adhesive is cured enough.
The joints are clean and do not have any loose parts of adhesive.
There are no excessive levels of humidity impeding the work.
The waiting time recommended by the manufacturer is over.
In case of large-size tiles, low-adsorption surfaces, or very difficult conditions of installation, a longer waiting period is suggested.
Grouting should not be understood only as an aesthetic operation. It is used to perform the final stage of the tile installation process; it should not be used to fix the inadequate stage of the adhesive set.
Typical Timeline for Tile Installation
A typical installation schedule may look like this:
| Activity | General Guidance |
| Substrate preparation | Before adhesive application |
| Adhesive mixing | Immediately before use |
| Tile placement | Within adhesive’s specified open time |
| Initial setting | Begins after installation |
| Light foot traffic | According to product instructions |
| Grouting | Commonly around 24 hours for many standard products |
| Heavy loading | After the specified curing period |
| Full service | Based on adhesive manufacturer’s recommendations |
These are general planning guidelines rather than universal technical specifications.
A rapid-setting product can have a significantly shorter schedule, while difficult environmental conditions may require considerably more time.
Fast-Setting vs Standard Tile Adhesives
Fast drying adhesives are intended for jobs where time savings are significant. They are useful in:
- Commercial projects
- Retail businesses
- Hospitals
- Hospitaries
- Airports
- Industrial operations
- Residential applications
The greatest benefit of using fast-drying adhesives lies in the ability to speed up the entire project.
However, rapid curing of the adhesive means that the workers will have less time to manipulate the adhesive. After the adhesive has started to set, it will be harder to move the tiles.
In contrast, normal-setting adhesives offer longer operational time, which is beneficial in big jobs or jobs that require precision.
Thus, one has to base their choice on the requirements of the task rather than on the promise of the adhesive drying the fastest.
The Role of RD Powder in Tile Adhesive
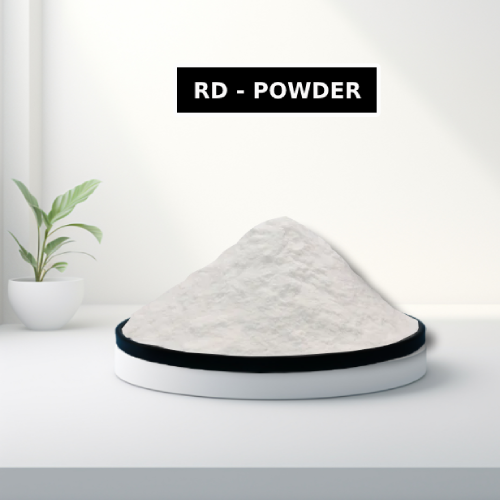
Modern cementitious tile adhesives often contain certain additives to provide an optimal combination of adhesion, flexibility, workability, water retention, and durability characteristics needed for today’s modern tiles. The RD Powder used in tile adhesive, also referred to as Redispersible Polymer Powder or RDP, is among the most commonly used types of polymer additives in dry mix formulas.
When dry glue is mixed with water, the polymer is redispersed and participates in the formation of the polymer phase in the cement-based system. Depending on the grade and formulation, it can improve different parameters like:
- Adhesion
- Tensile adhesion strength
- Flexibility
- Workability
- Deformability
- Resistance to abrasion
- Crack resistance
Water resistance
This is important for modern tiles, such as low-absorption porcelain and tiles of considerable sizes, as in this case, the adhesive needs to achieve more than mere mechanical fastening.
The ADDAGE AKULPOL 3032 polymer powder supplied by Sakshi Chem Sciences is a redispersible polymer specific for tile adhesives, tile grouts, and block joining mortar applications. As stated in the product information released by Sakshi Chem Sciences, it is a copolymer powder aimed at providing effective adhesion to inorganic surfaces and significant flexibility while also having resistance to abrasion.


Common Mistakes That Delay Drying and Curing
Using Excessive Amount of Water
Using too much water might make working with adhesive smoother, but it can also change its intended functionality and delay the curing time.
Stick to the recommended water-to-powder ratio.
Using Too Much Thick Adhesive
A thick bed of adhesive takes longer to set, hence causing an uneven drying process.
Installing Over the Surface with Moisture
Moisture underneath the adhesive is not conducive to proper curing.
Poor Preparation of the Surface
Dust, grease, and other unwanted particles will negatively affect the quality of adhesive bonding.
Walking on the Tiles Too Soon
Even minor movement can affect the spreading of the adhesive.
Grouting Too Soon
The adhesive should be dry enough so that grout can be applied.
Neglecting Environmental Factors
One has to be careful about using the same waiting time in a cool and humid room and in a hot ventilated one.
How to Make the Adhesive Work Better?
Good installation of tiles starts even before mixing adhesive.
Prepare the Surface Properly
The surface should be dry, clean, level, and within the moisture limits provided by the adhesive manufacturer.
Stick to the Mixing Ratio
Do not just eyeball the amount of required water.
Allow Adequate Maturation When Necessary
In some cases, a specific dry-mix adhesive requires some resting time after initial mixing. If your technical data sheet indicates maturation time, follow it.
Select the Suitable Trowel
Select a trowel that will give you adhesive coverage according to the size of the tile and installation conditions.
Verify Coverage
Installed large-format tiles may require extra attention to back coverage and contact with the substrate.
Avoid Premature Use
Protect a newly tiled area from employees, tools, ladders, equipment, and furniture.
Follow Product Data Sheet
As every adhesive formulation has distinct performance characteristics, in most cases, the technical data sheet takes precedence over general advice.
Environmental Conditions That Affect Tile Adhesive Performance
The environment can impact the installation schedule.
Hot and Dry Environments
Excessive heat can lead to fast evaporation of water from the adhesive, and lower open working time. Installers must try to work fast without using more adhesive than is necessary.
Cold Weather
Low temperatures slow down the process of hydration of cement, resulting in excessive curing time.
High Humidity
A high level of humidity prevents evaporation, especially in poorly ventilated places.
Installing in the Open
When tiles are installed in the open air, they are subject to many environmental effects such as sun, air, rain, and temperature changes.
Wet Condition
Wet conditions in areas such as bathrooms, kitchens, balconies, and swimming pool areas should be followed during the installation process.
How to Know When Tile Adhesive Is Fully Cured?
It is impossible to determine whether tiles are fully cured using a visual test. The tile may appear solid while the adhesive underneath is still gaining strength. It is wise and safest to adhere to the curing and loading times suggested by the supplier of the tile, keeping in mind existing climatic conditions. Professional installers can visually check for any signs of instability or movement and for any water-related problems. However, whether this will be accepted instead of the recommendations from the supplier should depend on the situation.
Best Practices for Faster and Safer Adhesive Drying
Instead of getting the adhesive to cure in an unnatural and overly accelerated way, the aim should be to provide an environment that enables its proper curing process.
Here’s what you can do:
- Use dry adhesive components only in dry conditions.
- Treat the surface before mixing.
- Use clean water as per ratio mentioned by the manufacturer.
- Mix all components properly with adequate equipment.
- Apply adhesive in proportion that is prescribed.
- Do not use it when temperature is either low or high.
- Keep appropriate ventilation.
- Protect the newly laid tiles from rain and excessive moisture.
- Do not let foot traffic earlier than it is allowed.
Follow all the requirements above to ensure a successful curing process.
Tile Installation Trends in 2026
In terms of tile installation, the situation is rapidly evolving as architects and construction companies turn their attention to large-sized porcelain tiles, ultra-thin slabs, tiles with reduced moisture absorption, and other decorative surfaces requiring a certain level of grit.
Tiles of this type definitely have a stronger impact on the adhesives being used, so the fact that conventional cement can be suitable for small ceramic pieces but ineffective in any other cases is a great reason to turn to polymer-modified dry solutions.
Moreover, there is a rising trend of manufacturers seeking the right combination of stickiness, flexibility, and usability of adhesive tiles.
Industry Standards and Professional Recommendations
The installation of tiles should comply with appropriate standards established by both national and international organizations, depending on the type of adhesive and project specifications.
Using EN 12004-1 as a benchmark, cement-based tile adhesives used in Europe and other countries are usually classified according to the rules described in this standard.
Moreover, depending on the project location, other standards might also be applicable. The manufacturer also provides data sheets with necessary technical specifications, including information about the application method, open time, setting time, thickness, substrate requirements, and curing time.
As a result, professional tile installers must follow the requirements of the standards and оperform the installation process using specific documentation of the product.
In the case of critical commercial or infrastructure projects, it is vital to follow the entire system advice given by the manufacturer of the adhesive used.
Why Waiting Saves Money?
A contractor may feel that adding an extra day taken toward curing a project slows down work, yet in fact, doing too much work too soon can lead to much greater expenses. For example, a loose tile may have to be taken up and put back down. Damaged grout may have to be cut out and reapplied. If a large format tile de-bonds, replacement would require labor, adhesive, grout, transport, and disturbance to the surroundings. In any commercial building, repairs can disrupt business activities. Therefore, the little time spent protecting a newly laid floor is an investment in performing well over the long haul.
Good building does not always mean building faster. Sometimes it means knowing not to build at all.
Why Additives Matter in Modern Tile Adhesive Formulation?
The performance of highly effective tile adhesives cannot be determined by cement alone. It results from the interplay of various components.
Cement functions as the hydraulic binding agent. The fillers will affect the viscosity and density of the material. Cellulose-based additives will assist with water absorption and workability. Polymer powders will improve the physical and adhesive qualities of the substance. Other components can influence drying, air management, and flow properties.
The formulation has to ensure the right balance between these ingredients.
For example, too high water absorption could affect drying conditions, but too low water absorption could make the application of the adhesive difficult. The choice of polymer may determine adhesive and elasticity characteristics. The total blend will determine how it performs with different types of tiles and substrates.
This is why RD Powder for Tile Adhesive should not be viewed as a standalone component. It is part of an elaborately designed dry-mix system.
Sakshi Chem Sciences: Supporting Modern Tile Adhesive Formulation
Sakshi Chem Sciences Pvt. Ltd. is situated in Nagpur and is a manufacturer, supplier, and exporter of dry-mix raw materials and construction chemicals.
The company has a product classification called ADDAGE AKULPOL 3032, which is categorized under tile adhesive and tile grout.
According to the product details provided by the company, AKULPOL 3032 is a polymer powder that has adhesive power and flexibility and is compatible with other mortar additives. It has other applications, which are listed by the company, such as cement plaster, gypsum products, EIFS/ETICS, self-leveling compounds, and repair mortars.
When producing dry-mix tile adhesives, manufacturers should choose the polymer grade in accordance with the required adhesive class, type of tile, surface, environmental impact, and mechanical properties.
Conclusion
It is very important that one fully understands the Tile Adhesive Drying Time and Curing Time when involved with tile installation or making adhesives for tiles.
Drying and curing are related but separate processes. Drying refers to the loss of moisture and hardening of the adhesive, whereas curing indicates that the adhesive continues to fulfil the expectations in regard to strength and performance.
The exact timeline depends on the glue formula, size of the tile, substrate, environmental conditions, etc. For the older traditional cement glue products, 24 hours can be taken as a common reference point before grouting or light traffic, but it should never replace the manufacturer’s recommendations.
When discussing the modern tile adhesive manufacturers, the formulation is equally important. All of the components, such as RD Powder for Tile Adhesive, help improve the adhesion parameters, flexibility, workability, and other characteristics of the adhesive when provided with a high-quality formulation. One of the products of the RDP brand produced by Sakshi Chem Sciences is the ADDAGE AKULPOL 3032 product intended for tile adhesive applications.
In conclusion, the best tile installation is the result of the right adhesive, proper application procedure, good conditions for operations, and patience with the adhesive operation doing its job.
Frequently Asked Questions
1. How long does tile adhesive take to dry?
The drying time varies by adhesive type and site conditions. Many standard cement-based tile adhesives may require around 24 hours before grouting under normal conditions, but the manufacturer’s technical data sheet should always be followed.
2. What is the difference between tile adhesive drying and curing?
Drying primarily refers to moisture leaving the adhesive and the material becoming firm. Curing refers to the continued development of mechanical strength and other performance properties.
3. When can I walk on newly installed tiles?
Light foot traffic should only begin after the adhesive manufacturer’s recommended waiting period. For many standard products this may be around 24 hours, but cold, humid, large-format, or low-absorption installations may require longer.
4. When can I grout after installing tiles?
Many standard cement-based tile adhesives can be grouted after approximately 24 hours under normal conditions. However, rapid-setting products may have shorter times, while difficult conditions may require longer.
5. Can I speed up tile adhesive curing?
You should not attempt to force curing by applying excessive heat or other uncontrolled methods. Instead, maintain the environmental conditions recommended by the manufacturer and ensure adequate ventilation.

Sagar Telrandhe is a Construction Engineer with a B.Tech in Construction Engineering & Management. Passionate about infrastructure development, project planning, and sustainable construction, he specializes in modern construction techniques, project execution, and quality management, contributing to efficient and innovative building.