When we want to improve the appearance and durability of buildings, it is extremely important to choose the best wall putty.
Wall putty is an essential element in any construction process. It provides a smooth surface for painting and an attractive finish. It is also a protective barrier against cracking, peeling and damage from moisture.
Table of Contents
Today, there are numerous brands of wall putty available in the market. This makes it hard to choose the best wall putty. However, to help you make the right choice, we will provide an in-depth explanation on how to choose the best wall putty, and most importantly, the best way to dilute wall putty.
Understand Wall Putty
Wall putty is essentially an adhesive construction material used to achieve a smooth surface for walls and ceilings.
The following are the main components of any wall putty solution –
- Powders – Plaster of Paris
- Liquids – Linseed oil (raw)
- Thinner – Mineral thinner
- Drier – White lead
Wall putty mix looks like clay in appearance but has a remarkably higher plasticity. It is useful for getting a smooth and durable base for painting surfaces. Putty is also widely used as a filler or sealant. It can effectively fill in cracks or patches in old walls and other flat surfaces. You can give any color to walls or ceilings after applying a layer of putty.
Putty for walls is highly diverse and can be applied to interior and exterior walls, old and new alike. Prior to painting a surface, it is recommended to apply at least two coats of wall putty. The first coating helps to fill any cracks or gaps on the surface. The second layer of putty gives the surface a smooth and even finish.
High quality wall putty is multipurpose and versatile. It can be applied on different types of wall surfaces, such as plaster, concrete, and drywall.
How To Choose The Best Wall Putty?
There is a wide range of diluted wall putty solutions available today. Let’s check out the different varieties of wall putty you can find in the market.
Cement Wall Putty
Cement-based wall putty is also called cement putty. It is largely used for repairing masonry and concrete surfaces. Cement wall putty comes as a powder and needs to be mixed accurately with water before use.
The consistency of cement putty should be like that of peanut butter, meaning that it should not be too thick or overly fluid-like. Once you get the correct consistency, you can simply use a putty knife to evenly spread it all over the wall surface. You will need to let cement-based wall putty dry for a day (24 hours) before painting the surface.
Acrylic Wall Putty
Acrylic-based putty is often called acrylic putty. It is multifunctional and can be used on drywall and plaster bases with equal ease. Acrylic putty comes in a ready-to-mix powdered form which makes it efficient to use. It gives a very smooth finish and can also be tinted according to your choice. This makes it easier to match the color of the putty base with the paint coat. However, studies have shown that acrylic wall putty is not as durable as cement-based putty, as it can develop cracks or chips over time.
Polymer Putty
Polymer-based wall putty is a comprehensive mixture for leveling cement, concrete and polyurethane surfaces. It combines the properties of cement and gypsum-based wall putty but is significantly costlier in comparison.
Gypsum Putty
Gypsum-based wall putty is meant for use on dry places indoors, such as bedroom, living room, corridor, etc. This wall putty solution takes a few days to dry completely after applying. However, gypsum wall putty can quickly decompose and get damaged with moisture.
Water-Dispersion Putty
Water-dispersion wall putty is mainly used to align different-leveled surfaces, and different materials. For instance, water-dispersion putty can be used to match a brick, or concrete surface evenly with one another.
Oil-Adhesive Putty
Oil-adhesive wall putty is applied on concrete, plaster and wood surfaces when they need to be painted. It has superior adhesiveness as compared to others.
Polyester-Based Putty
Polyester-based wall putty is used for covering concrete, natural stone, as well as varnish or paint coating over metal. It is also useful to seal holes, which also makes it effective in preventing corrosion or rust on the surface. This type of wall putty has incredibly good adhesion, improved water resistance, and enhanced strength.
Apart from the differences in its base component, wall putty is also classified according to their specific purpose.
For example, wall putty plasters can be:
- Basic – This is the common type of plaster for walls. It is useful to correct irregularities, fill cracks, and close gaps. This type of wall plaster is usually applied in an 8 mm thick layer. If the first layer plaster fails to hide irregularities, then you will need to apply another coat of basic plaster.
- Finish – This type of plaster gives a smooth and even finish to the surface. This wall putty is applied as a thin layer and usually coated on the pre-dried basic putty.
- Universal – This type of wall putty coating is useful for basic coating and finish layering. However, it can be costlier and not always as efficient as the special basic or finish coating wall putty.
The different types of wall putty have their own pros and cons, which make them suitable for specific applications. For instance, cement putty turns harder on drying than other types of putty. On the other hand, acrylic latex-based putty dries quicker and is easier to use.
Besides these, there are several other factors that need to be considered before choosing any type of wall putty. Below are some of the main points that you need to remember before you buy any type of wall putty:
- Safety – Choose wall putty mixtures that do not contain any harmful component.
- Adhesion – It should have good to excellent adhesive properties.
- Resistance – It should be highly resistant to damage from external influences/factors.
- Convergence – It should achieve a smooth surface without using additional materials.
In addition, it is necessary to figure the stage at which the wall putty will be applied for level coating. This will help you to make the right choice when buying wall putty.
Why To Choose Dilute Wall Putty?
Wall putty is available as a ready-to-mix powder. It generally contains a main filler, several additives, and different building components.
Before being applied, wall putty needs to be diluted properly in water. Hence, make sure to read the Instructions for Use label on the packaging carefully. It is extremely important to dilute wall putty properly for effective application.
Improper preparation can adversely affect the final finish and texture of the wall putty. For instance, adding too much liquid/water to the mixture makes it excessively fluid. This prevents the putty from getting a smooth and even surface on drying.
In contrast, adding too much mixture and less water tends to make the putty solution thicker. It can cause formation of lumps in the mixture. This is not desirable when you want to achieve a uniform and smooth surface all over.
Hence, it is extremely important to ensure proper wall putty blend, as instructed by the manufacturer.
Choosing The Right Water-To-Putty Ratio
It is extremely important to choose the right water-to-putty ratio, as this:
- Prolongs putty life by making it more durable
- Builds temperature resistance
- Extends shelf life of prepared putty compound
- Gives an affordable surface smoothing solution
- Makes it easier to apply the putty on prepared surfaces
- Can prevent moisture and humidity damage, such as peeling and disintegration
Preparation Of Mixing Tools And Equipment
Following are the mixing tools and equipment you need to dilute wall putty and prepare it for application –
- Bucket – A large, sturdy and clean plastic bucket is recommended for mixing the putty with water.
- Mixing tool – A mechanical mixing tool helps during the blending process by preventing lump formation because of the quick-drying nature of putty mixture.
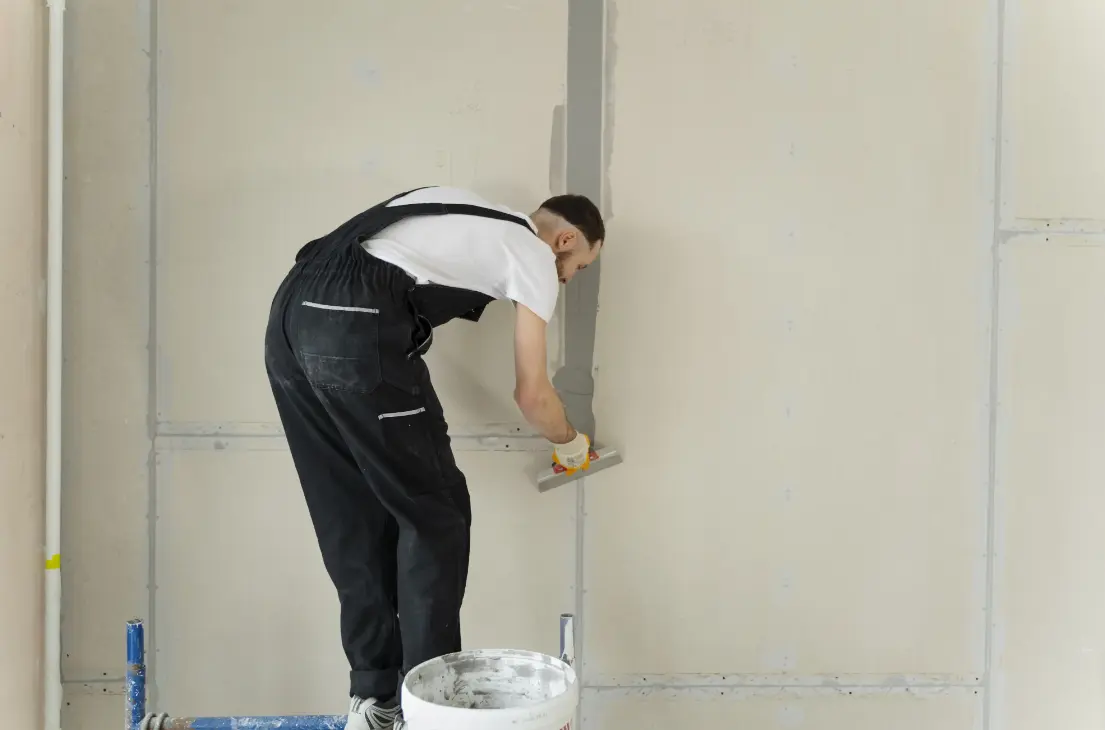
- Wall putty blade – This is a flat tool useful to apply putty evenly and achieve a smooth, even surface.
- Sandpaper – Once the layer of putty dries completely, the surface is rubbed with sandpaper to remove small uneven patches or unwanted additional particles.
Step-By-Step Dilution Process
(For Cement & Polymer Wall Putty)
Here is a simple step-by-step dilution process for preparing cement and polymer wall putty –
- Fill the bucket with the required amount of water, making sure to wet the inner wall of the container evenly.
- Gently pour in the dry wall putty solution into the water, as per requirement, and leave the liquid mixture for 3-5 minutes.
- Use the mechanical mixer to gently stir the solution in a circular, left-right and up-down motion.
- Stop mixing the solution once you achieve the desired consistency
- Use a spatula to clean any remnants of the putty mix from the wall of the container
- Let the mixture alone for 10-15 minutes until it settles
However, if you do not have a mechanical mixer, you can still dilute wall putty with your hands. Below are the steps to dilute wall putty manually –
- Pour dried putty powder into the bucket/container
- Pour in the desired amount of water
- Use a thick stick or spatula to stir the mixture in a circular motion, gradually moving from the center of the bucket to the walls
In case the mixture looks too fluid-like, you will need to add more putty powder. On the other hand, if the mixture looks too thick, then you may add some more water to get the consistency right.
Please remember that when mixing putty powder manually, you should always pour the putty powder in first. Do not add the water first, as required when using mechanical mixer for preparation. If you pour water first, followed by the putty powder, then this may cause lumps to form in the mixture. These lumps are difficult to get rid of, and you may end up having to redo the entire batch.
(For Gypsum Wall Putty)
This is a simple step-by-step process for making gypsum-based wall putty successfully –
- Pour 7 (seven) trowels of putty powder into the mixing bucket
- Add same volume of water/liquid to the powder in the mixing bucket
- Use a mechanical mixer to blend the compound thoroughly
- Add the remaining part of putty powder and water/liquid and keep mixing till you get uniform consistency
- Leave the mixed solution for 2-3 minutes to swell
- Repeat the mixing steps till you create the amount of putty required
(Adding Hardener To Wall Putty)
Generally, companies clearly indicate the right proportion of hardener the putty needs to be mixed with to achieve uniform consistency. In case this information is not provided on the packaging, the amount of hardener should be equal to 3% of the total volume of putty.
On the other hand, you can also follow these steps to determine the best way to add hardener in your wall putty solution –
- Take a spatula-full of mixture and transfer it to another spatula
- Scrape half of the mixture from the first spatula so each spatula has equal parts (50-50)
- Repeat the procedure by dividing the portion of mixture 3 times, till you have only 12% of original amount of mixture on the spatula
- This is then further divided into four equal parts, which in turn gives the required 3% hardener
This procedure requires significant care when kneading. The reason is that adding excessive hardener can cause insufficient interaction between the particles of the putty solution. This can result in the formation of stains on the treated surface.
On the other hand, if the proportion of hardener is less than 3% it can cause the solution to become excessively fluid. This makes it difficult for the mixture to cover the base surface completely and evenly.
Checking Consistency
Any wall putty solution should have a noticeable density and consistency after being diluted.
To achieve uniform consistency and density, it is important to know the correct ratio of the putty mixture and water. The proportion of mixing differs according to the type of wall putty.
For example, cement wall putty mixture needs to be mixed with 2 times less: 0.37 – 0.42 liters of water, per kilogram of putty. Gypsum wall putty is diluted in the ratio of 1:0.8, meaning that you should mix 1 liter of water in 0.8 liters of gypsum-based wall putty.
In the same way, you will need to mix polymer wall putty in the ratio of 1:0.25, meaning you will need to mix 1 kilogram of polymer wall putty in 0.25 liters of water/liquid for best results.
However, the ratio of mixing water in wall putty powder can change depending on the situation.
For instance, you will need the wall putty to be thicker for a basic finish. To do this, you will need to restrict the amount of water/liquid you mix with the putty mixture. In contrast, you will need to increase the amount of water and make the putty more malleable when it is intended for decorative purposes.
Avoid Common Mistakes
Wall putty can give an incredibly impressive finish to walls and ceiling surfaces. However, there are times when small mistakes can significantly affect the final finish of the product.
Here are some common mistakes you should avoid when applying wall putty –
- Clean application surface – Make sure the wall surface is completely clean, and slightly wet before applying wall putty. It is recommended to use sandpaper to level the concrete surface of walls and ceilings and make them completely smooth. The aim is to remove any loose materials from the wall surface to ensure complete adhesion of wall putty.
- Correct water and putty ratio – Most masons know that the right ratio of mixing putty with water is 2:1. However, you should always refer to the manufacturer’s instructions on the packaging label to get the right consistency, which is like peanut butter.
- Avoid overcoating – Experts recommend that the ideal thickness of wall putty coating should be 1.5 mm. Coating wall putty thicker than this can cause it to crack and peel away.
Safety Precautions
These are the safety precautions to use before applying wall putty. These precautions can make the difference between a smooth finish and amateur workmanship –
- Remove dirt from cracks – You need to ensure that any cracks, holes, or uneven patches of the wall surface are completely devoid of dirt particles. If needed, you can use a pointed tool, such as a screwdriver to pick our dirt and debris from cracks and holes in the surface of the wall or ceiling.
- First coat – Make sure to let the first coat of putty dry sufficiently. For cement-based wall putty, the ideal drying time of the first coat is around 6-8 hours, or 30 minutes to 1 hour, in case of acrylic wall putty.
- Primer coat – Before applying acrylic wall putty make sure to apply a coat of primer before the final finish.
Cleaning And Maintenance Of Mixing Tools
Once you have prepared the wall putty mix, it is time to care for your tools. Follow these simple instructions to clean and maintain the wall putty mixing tools –
- Clean the mechanical mixer and the mixing bucket with warm water thoroughly, until there are no visible traces of putty mixture.
- Make sure to put the washed mechanical mixer with the nozzle downwards. Else, droplets of solution or water residue will collect within it, and make it rust quickly.
- Only use soft lint-free pieces of cloth to remove traces of moisture from the mechanical mixer, bucket, spatula and any other instrument.
Useful Tips And Tricks
Here are some useful expert tips and tricks when working with wall putty mixtures –
- When mixing the solution, start slowly and gradually increase the speed. This will help prevent the formation of bubbles and lumps in the putty mix.
- Make sure to let the solution rest for some time after the first round of mixing before stirring it again. This helps the mixture to blend well with the liquid.
- Use only clean tools and containers, as bits of old putty mixtures remaining on the tools or containers can affect the consistency and elasticity of the fresh batch of putty mixtures.
- Always take small amounts of wall putty when applying, to avoid lumps, and risk of quick drying. If, for some reason, you have created extra mix, you can simply pour the remaining into a thick-walled container. Make sure the container has a tight-closing lid to prevent it from drying, so you can use the remaining solution later.
- Make sure to check the expiry date of wall putty solution on the packaging label before buying. Putty solutions after their best-before date tend to set quicker and are also uneven to spread on surfaces. They may also stick to the spatula which ultimately affects the final finish of the surface.
Sandip Agrawal, Polymer Engineer and MD of Sakshi Chem Sciences Pvt. Ltd., leads innovation in construction chemicals, shuttering oils, and industrial lubricants. With expertise in polymer science and eco-friendly solutions, he drives R&D and sustainable advancements, ensuring high-performance products for India and global markets.