When it comes to renovation and construction of houses, the durability and longevity of walls are the biggest concern and it should be sturdy. One such great way of achieving that is through waterproof wall putty.
The idea is innovative modernization behind walls with moisture exposure, like kitchen and bathroom walls, or, in some cases, basement walls.
What else can it do apart from giving a smooth and blemish-free finish to your walls? waterproof wall putty protects these walls from water damage, mold, and mildew. T
he blog will provide you with rudimentary info on waterproof wall putty, how to apply it, and the bulk of its advantages.
Table of Contents
Basic Formulation of Waterproof Wall Putty
The formulations of waterproof wall putty are simply mixtures of white cement and fine fillers and certain special additives, which should be preferably applied before painting as primer to smoothen uneven surfaces for improvement of adhesion with the wall paint.
Earlier used for filling cracks and any small defects to form a relatively smooth base for paint or wall finishes to be freely applied on it.
The main ingredients of waterproof wall putty are:
White Cement: It gives strength to the putty and aids adhesion on various surfaces.
Fine Filler: These fulfill the requirement of creating smoothness and filling very small cracks.
Polymer Additives: These are special chemicals that improve the flexibility and waterproof nature of putty.
Binders: They give strength in the way that putty can conveniently bond onto the wall surface and would not be able to crack easily over time.
What Additives Help Make Wall Putty Waterproof?
Water resistant wall putty includes special ingredients that help it resist moisture. Some of such ingredients include:
1. Silicones: Moisture is repelled by these because they are able to withstand high amounts of water. The silicone compounds used in wall putty makes the compound superb, in addition to providing complete water protection to sink deeper into the surface for the walls.
2. Acrylic Polymers: Acrylic polymers like redispersible polymer powder, MHEC make the putty more durable and resistant to moisture and grants it improved adhesion and tensile properties.

3. Hydrophobic Agents: This additive serves to make putty impervious to water absorption, especially when applied on walls located in high humidity zones.
4. Microfibers: The ultimate aim of modifying certain products with microfibers is to augment the flexibility and strength of putty, thus reducing chances of cracking and peeling in wet applications.
The described blend is posited to render waterproof wall putty more suited to moist areas, where smooth walls have been protected from moisture-induced damage.
Waterproof Putty vs Normal Putty
Despite this common conception, regular putty is likely from all other types.
Moisture Resistance: While resistant to moisture, waterproof putty works well in places like bathrooms and kitchens and sealed walls outside. Regular putty does an unworthy job of moisture repulsion, absorbing water and causing mold or wall damage.
Durability: Waterproof putty resists damp conditions much better than regular putty; it retains both form and strength. Regular putty easily cracks and peels off on getting very wet.
Application: Ordinary long-lasting putties are not waterproof. They might do fine in dry conditions such as living rooms or bedrooms. However, waterproof putty is warranted in spots where moisture is a deterrent to walls. Using non-waterproof products in zones reliant on dampness could lead to wall damage and peel them off faster.
Costwise: waterproof putty becomes too expensive than ordinary putty types because of the specific ingredients contained, which are fitted to give water resistance. Nonetheless, it is worth the extra cost for some work.
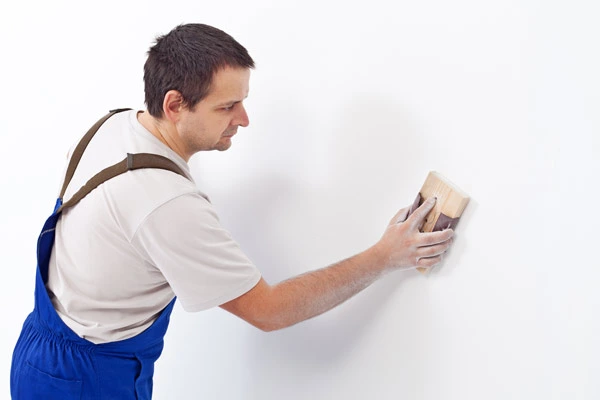
Steps for Applying Wall Putty
Putting putty on walls isn’t too hard, but doing it will give you the best outcome. Just stick to these main steps to get a smooth finish.
1. Surface Preparation: Before starting with any kind of treatment on the wall, remove dust, dirt, or grease using a mild detergent solution, if very dirty. Also, repair any cracks or holes with appropriate wall putty.
2. Mixing the Putty: The putty, which must be waterproof, should be mixed with water in the exact proportion as specified by the manufacturer until a nice, thick paste that is easy to spread has been made.
3. Application of First Coat: The first coat acts by filling the surface when applied thinly on the wall with the help of a putty blade and a trowel. Ensure that the cracks and other surface imperfections have been well filled, yet done in as smooth an application as possible.
4. Drying: The first coat is allowed to dry completely (3 or 4 hours). Drying and curing of putty is extremely slow because of moisture and humidity present during this time.
5. The Additional Coat: You may want to add a second, and sometimes even a third coat, depending on how you find the application of the first coat and its smoothness. Sanding with a hand sanding block or sandpaper should be done before further coats are added, and only after they are dry enough.
Sand your walls between each coat so as to remove any imperfections or rough surfaces. Be careful not to sand off too much; otherwise, you risk ruining the texture. When dry and level, paint as appropriate. You may want to add a primer coat, then apply your choice of wall paint.
Waterproof Wall Putty Advantages
For a very long time, waterproof wall putty has been highly rated and has gained significance among homeowners and builders. Let’s look at certain benefits quickly:
Water Protection: Their primary feature is that walls are bound to be moisture-proof. This is more noticeable with bathrooms, kitchens, and basements, where increased moisture brings forth high humidity and allows for the formation of dampness, molds, and mildews.
No Cracks or Peeling: Waterproof putty ensures a crack-free surface, which will not peel in moisture from the outside. So, there will be no effect on muddy water and infections in the area.
Increased Durability: Waterproof wall putty makes sure a thicker surface against moisture compared to conventional wall putties. Hence, redoing repairs and touch-ups will not become a part of your life.
A Smooth Finish: Waterproof putty soon makes way for other finishes whereby even surfaces are filled up on the walls. Hence, a polished wall can be achieved without the negativity of further imperfections.
Economic Decision: Though a bit expensive, it is justified and is quite an investment since it offers numerous advantages during its entire service span.
Growth of Mildew and Fungus: Waterproof wall putty offers great resistance against moisture infiltrating walls, effectively preventing any formation of molds and mildew; therefore, this ensures a healthy living environment.
Conclusion
Waterproof wall putty is important in constructing buildings for better aesthetic presentations and control of moisture issues.
It acts as protection against water and fungi, and it is of tremendous importance to people living in humid conditions or near water sources.
It is easy to apply; it does give very good job opportunities for a smooth, strong, and long-lasting finish for the unit containers in such places. Those looking for that extra assurance to safeguard their interiors must consider waterproof wall putty.
FAQS
What is waterproof putty used for?
This includes filling, correcting the uneven surface, preventing moisture infiltration through cavities, and cracks. Other applications extend to bathroom, kitchen, and external walls exposed to rain.
What are the advantages of waterproof wall putty?
Less moisture absorption, therefore preventing cracks or peeling paint; more resistance to aging; yielding satisfactory surface for paint application; protection against molds and mildew.
What’s the difference between waterproof and normal putty?
Waterproof putty offers the advantage of being specially formulated for exposure to moisture; thus, this product exhibits more durability and resilience in particularly high humidity environments. In contrast, standard putty does not offer any such benefits and, more importantly, performs much better when used in dry conditions.
How many coats of waterproof wall putty would you need to finish a ceiling?
Two to three coats of waterproof wall putty must usually be applied. Depending on the surface condition of the treated area, more coats might be required in order to achieve a better finish with increased strength.
What is waterproof wall putty made of?
Waterproof wall putty is made from white cement, with some fine fillers and special additives that provide moisture resistance and durability, namely, acrylic polymers, silicone, and hydrophobic agents.
How to make putty waterproof?
By admixing appropriate polymer additives, certain hydrophobic agents, and, in some cases, acrylic binders to the putty, you can usually ensure moisture resistance and good adhesion to the walls.
Applying waterproof putty means protecting those walls as an investment, and keeping them smooth and beautiful for many years.
Sagar Telrandhe is a Construction Engineer with a B.Tech in Construction Engineering & Management. Passionate about infrastructure development, project planning, and sustainable construction, he specializes in modern construction techniques, project execution, and quality management, contributing to efficient and innovative building.