Introduction
Any inconsistencies in levels and heights shall prove to be problematic when you are undertaking the tiling, weeding out vinyl, lamination, or carpeting. In such cases, the facility to smoothen out these uneven floor areas will be aided by self-leveling compound.
Yes, you save yourself some real time and can accomplish this task with great ease. If you’re a well-experienced DIYer or an absolute first-timer, you’ll find this guide to be a step-by-step overview of the procedure, addressing the most pertinent questions along the way.
Table of Contents
During this time, this article will make it quite clear to you how to apply self leveling compound, approximate drying times, how to utilize it over existing tiles, what to observe for minimum and maximum thicknesses, and some good troubleshooting advice. Onward then!
How to Lay Self Levelling Compound?
Applying self leveling compound is a very simple task if you do it the right way. Below are the steps involved:
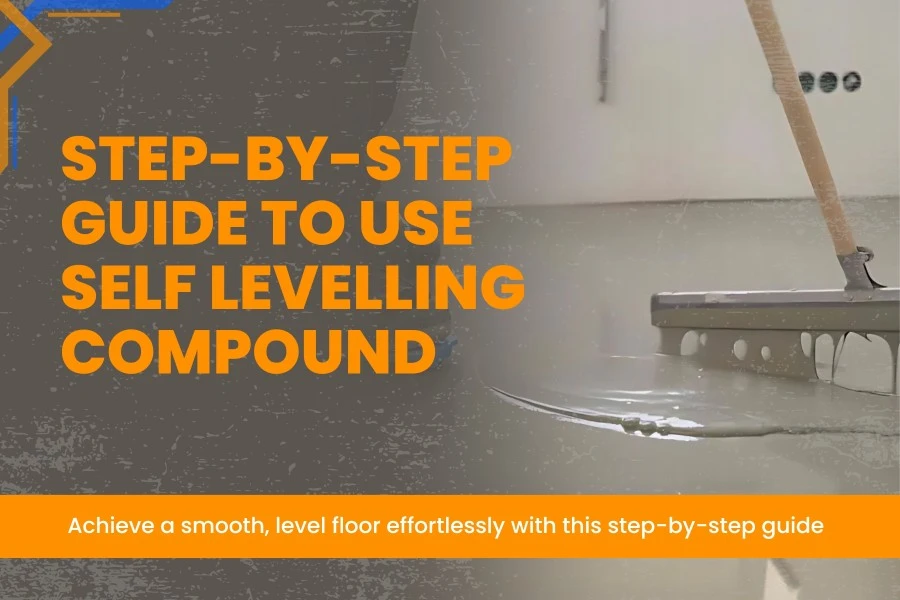
1. Prepare the Surface
Clear your floor of dirt and moisture before applying any compound. Thoroughly clean the work surface of any dirt, grease, and other debris. Also, any large cracks or holes must be filled with an appropriate filler.
2. Apply Primer
A primer is recommended by manufacturers to form a coat which prevents excessive absorption of moisture into the newly poured compound until the levelling material has dried; it will help to achieve optimal chemical bonding effectiveness between the compound and flooring material.
3. Mix the Self-Leveling Compound
Follow the water mix ratio guideline as given on the product packaging; thoroughly blend in a large bucket until uniformly mixed – a power drill equipped with a mixing paddle works best to achieve consistent blending free of lumps.
4. Pouring and Spreading
Start pouring from a corner of the room, using a trowel or a spreader instrument; this helps to ensure equal distribution throughout the whole area while leveling naturally into the low spots to effectively rectify any unevenness across the surface.
5. Give It Time to Settle and Dry Completely
Leave sufficient time for the new substance(s) before stepping on them. Primary to keep an eye on how this is done since various variations in time arise from variations in environmental conditions below greatly affecting the success of the end result!
How to Use a Self-Leveling Compound?
If you have badly installed tilted tiles and do not wish to tear them out, then self-leveling compound would be right for you.
Preparation: Wash the surface, dirt, grease, etc., and then apply the primer.
Fill Behind Grout Lines: Make sure to fill the deep grout lines with all-purpose filler before putting down the self-leveling compound.
Pour and Spread: Do it as before. This is important to ensure good, even spreading over the tiles.
How Long Does a Self Levelling Compound Take to Dry?
In general, drying time is determined by thickness, temperature, or humidity.
Thin Layers (1-3 mm): Usually dries in 2-4 hours.
Thick Layers (5-10 mm): May take 12-24 hours.
Heavy Thickness (up to 50mm): May take 48 hours or more.
It is nice advice always to bear in mind the manufacturer’s instructions, and proceed with care.
How Does Self-Leveling Cement Work?
Self-leveling cement is one other that is polymer-modified, with an exceptionally fluid characteristic when poured; all this makes sure that self-leveling occurs. This is done by:
Filling Low Spots: Automatically fills the gaps after being poured into.
Quick-setting: Solidifies to yet another plain surface within hours.
Giving a Sturdier Base: Founded a stable base for different kinds of flooring.
How Much Self Levelling Cement do I Need?
To arrive at a correct estimate:
Note the dimension of the room in square meters or square feet (length × width).
Work out the necessary thickness.
Refer to the coverage chart by the manufacturer to find out how many bags are needed.
It generally takes a 20kg bag to cover 4-5 square meters at a thickness of 3mm.
How to Mix Self Levelling Compound?
Properly mixing is the key to achieving a smooth application in your project. Follow these guidelines to achieve the best possible results:
1. Utilize Clean Water:
Start by pouring a specific amount of clean, room-temperature water into the mixing bucket. This method allows the complete activation of the compounds and prevents possible contaminants that would affect the quality.
2. Add the Compound Steadily:
While stirring the water with a mixing tool or a paddle, add the dry mix gradually and without stopping. This method prevents lump build-up that would affect the texture and application of the solution.
3. Use a Power Mixer:
This is a drill with a paddle mixing attachment. It provides the necessary brute force to blend the mixtures, this guarantees that adequate foaming takes place. This method also assures that all components are well integrated and no clumps remain.
4. Mix Until Uniform:
Continue mixing until the compound is smooth and the consistency of thin pancake batter. The mixed-up compound should have no visible dry powder in it; it must apply smoothly and evenly.
If you follow this improvement in procedure, you are assured of a great blend, making a world of difference in your application process.
How Thick Can You Lay a Self Levelling Compound?
The thickness will depend on the type of compound:
Standard self-leveling compounds: From untainted 0 to 5mm in a single pour.
High build: Up to 50mm with reinforcement.
For deeper leveling, you may have to resort to multiple layers, allowing each to dry before putting on the next.
Conclusion
Self levelling compound has become the go-to way to fix uneven floors, be it over concrete, tiles, or wooden subfloors. With a bit of proper preparation, mixing, and application skills, you can get flat rare soil surfaces for further flooring work.
Being conversant with the drying times, thickness limitations, and odds against you leads to a relatively torturous experimentation.
For best results, always read manufacturer guidelines, and take your time to apply the compound properly. Not only will a level floor look better, but it will also prolong your flooring. Go ahead with the floor installation project now that you have all the know-how!
FAQS
How long before you can walk on self-levelling compound?
Most compounds allow light foot traffic after 4-6 hours, but full curing may take from 24 hours up to 48 hours.
What are the problems with self-leveling compounds?
Cracking: If applied too thick or mixed incorrectly.
Bonding issues: Missing primer can cause poor adhesion.
Weak surface: Too much water can weaken the compound.
When not to use self-leveling compound?
Do not use it over weak, crumbling substrates, not in extremely humid or wet conditions, and without proper priming on porous surfaces.
What is an alternative to self-leveling compound?
Plywood underlayment for wooden floors.
Grinding or sanding for concrete imperfections.
Thinset mortar for minor corrections on tiles.
What happens if you add too much water to a self-leveling compound?
More water in the mix means a weaker combination, resulting in:
Poor adhesion.
Make for less strength.
Longer drying time.
What happens if you use self leveler without primer?
Bonding problems, uneven drying, increased possibility of cracks and delamination occur if primer is not applied.
What is the maximum depth of self-leveling compound?
Self-leveling compounds generally can be poured to a depth of 5mm, while specialist compounds can be poured to a depth of 50mm.
Is self-leveler as strong as concrete?
It is tough, but it is not as strong as regular concrete. It serves as a base layer rather than structural material.
What is the minimum thickness for self-leveling compound?
Most compounds can be applied as thin as 1mm. Always check the product specifications for optimal performance.
Sagar Telrandhe is a Construction Engineer with a B.Tech in Construction Engineering & Management. Passionate about infrastructure development, project planning, and sustainable construction, he specializes in modern construction techniques, project execution, and quality management, contributing to efficient and innovative building.